Connect with educators in Charlotte-Mecklenburg Schools.
Teaching & Learning in CMS
  • Home
  • Blog
  • Contribute

Teaching Geography with Mystery Skype

4/21/2014

3 Comments

 
by Megan Mehta, Third Grade Teacher, Ballantyne Elementary
Picture
We were a few weeks away from a unit centered on the 5 Themes of Geography, and my options were looking like either a) pull the info from the textbook, or b) do something the kids would be excited about.  So I started doing some research and some thinking and this is what I came up with:

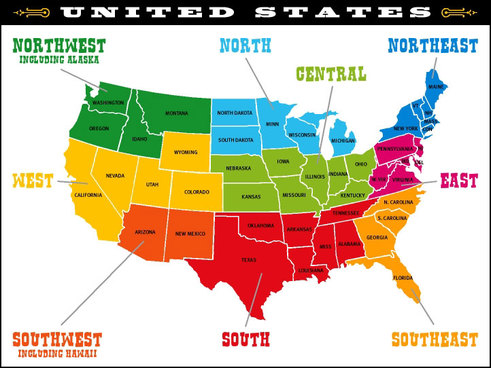
We would still use the 5 Themes framework, but I wanted them to branch out beyond the borders of North Carolina.  I also wanted them to work collaboratively while sustaining interest in a project that was going to span a few weeks. I began with a regional map of the United States:

Picture
I split up the kids and let them choose their regions.  Each and every group was excited about their region because someone had some connection to a state, so we were off to a great start!  The next step was to figure out a way to organize our information.  We are a BYOT school, but not all of my kids have devices, so we discussed ways to keep track of our learning and research and decided on a common graphic organizer:
Picture
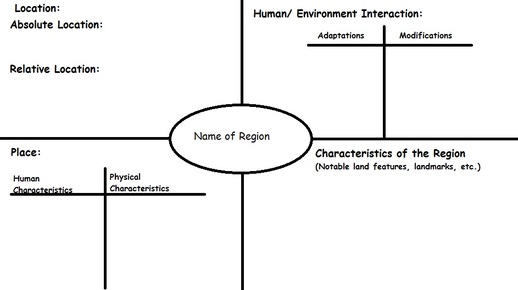
Hey! That's only 4 themes! I decided to omit the "movement" theme for the purpose of this unit, as we will be learning about it later in the year.  Anyway, we discussed the themes as they related to Charlotte, North Carolina, and began with Location.  They immediately realized that finding the absolute location of their region was going to be tricky. One group's solution was to do it just for the capital cities in their respective states; the other groups declared them geniuses, and everyone was happy with the solution. For relative location, some groups chose to describe it for the capital cities, some chose to focus on the region itself.

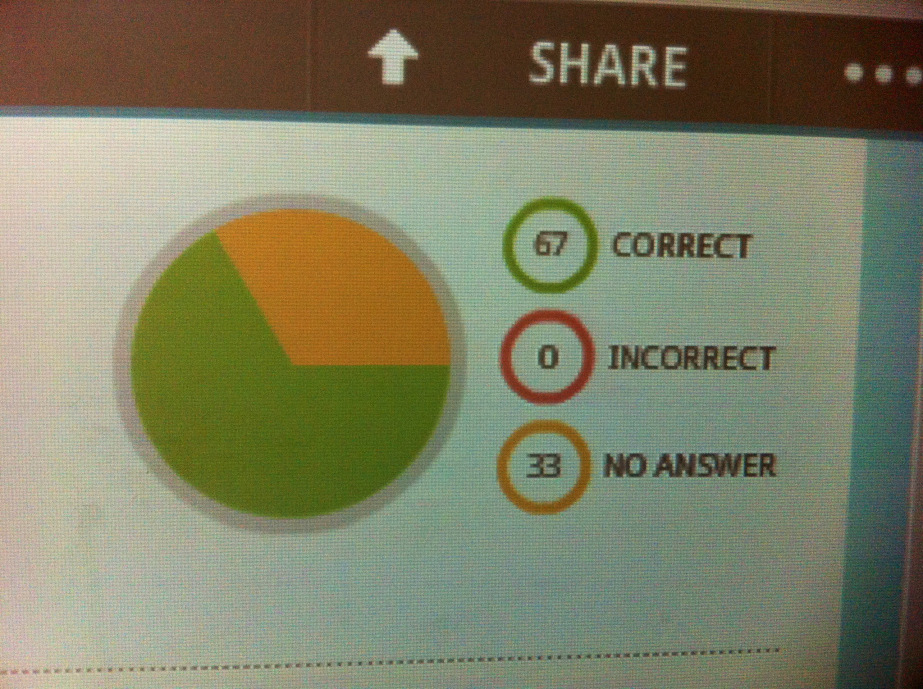
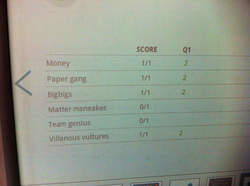
We went through each of the remaining themes like this: I modeled, they applied. I assessed them with a simple rubric of 3 (mastered), 2 (partially mastered) and 1 (not mastered), and provided support where needed. I expected to be tearing around the room with my hair on fire, but the kids were really into this and did an amazing job of working collaboratively.

We finished our graphic organizers (this took about 4-5 class periods of 45 minutes each) and I was (fairly) confident we were ready to set up our first Mystery Skype. I found a list of jobs and tweaked it to meet our class needs. What we ended up with was this:

  • 1 note taker (records the clues on paper)
  • 2 tweeters (to live tweet the event, of course!)
  • 3 moderators (the faces of our class-- asked the questions from the inquirers and relayed answers to the mappers)
  • 4 state experts (answered the questions from the other class)
  • 3 inquirers (asked questions based on the mappers' notes)
  • 4 mappers (used maps of the U. S. and Google Earth to narrow down the other class' location)
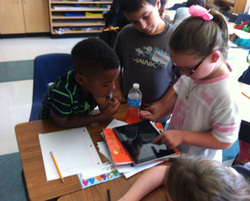
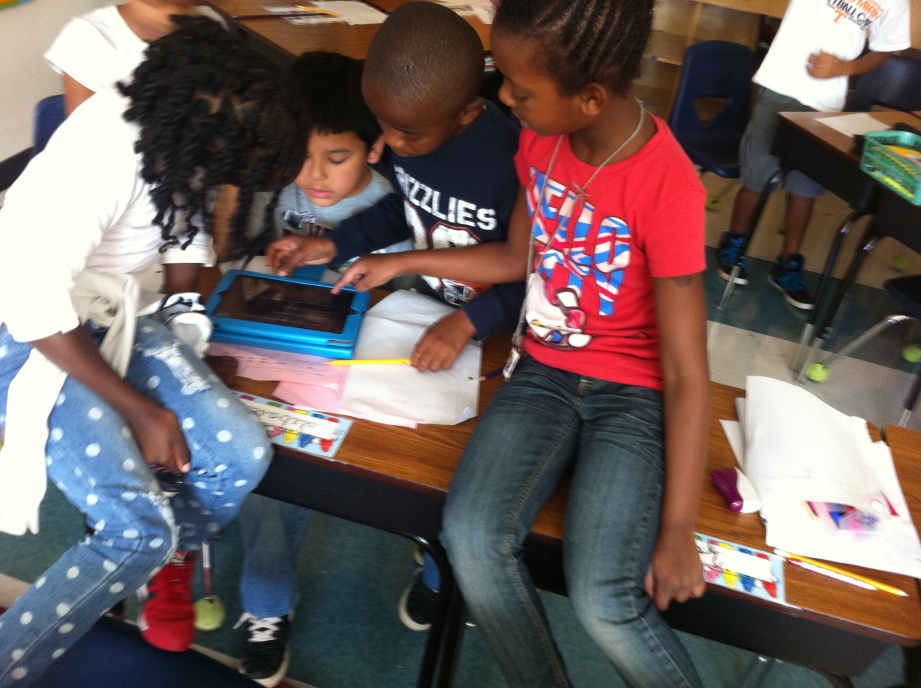
  • 2 photographers (used iPads to document the experience)

For the first call, I assigned the jobs but in subsequent ones, I have had them pull them out of a hat (a fancy word for "quart-sized storage bag") and given the option to trade.


To set up the call, I turned to the Great and Powerful Twitter.

Picture
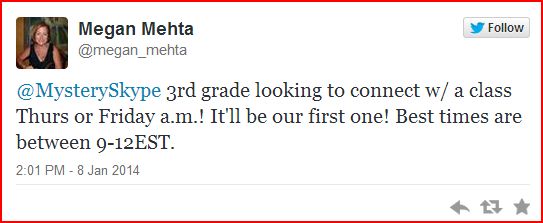
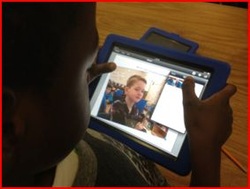
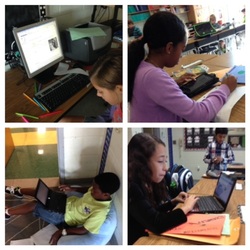
Within hours, we had three classes wanting to connect. I learned quickly that scheduling can be a challenge with our regimented days, but with some creative rearranging we managed to find a time to connect with a class in Iowa. I told them from the get-go that we were completely new to this in case we breached some Mystery Skype protocol or etiquette that we were unaware of. We took our cues from them and we were off and running! Their first question asked us if we were in the U.S. and where we were in relation to the Mississippi River. It took all I had to restrain myself and let the kids figure out the strategy! I'd like to say that everyone stuck to their job and their assigned classroom area the whole time and everything went perfectly... However... we had sound issues which made it all much more difficult than it should have been. We couldn't get skype to work on our desktop, so we were using an iPad. The speakers I had weren't working, so the only audio we had were the tiny sounds coming from the iPad speakers. In a room full of excited 8 year olds, this is not ideal. At one point, I was leaning in to the speaker to listen, not realizing my face was right in the camera. Not exactly the big screen debut I was hoping for, and I'm pretty sure I reappeared in a subsequent nightmare or two because that was one intense close-up. Also, the kids were SO excited that they were (of course) all over the room, talking over each other, doing each other's jobs, and often doing everything but paying attention to the clues. BUT, we made it! After 45 minutes, they had guessed our location and we figured out theirs (with a little help).
In all, it was and continues to be an amazing learning experience for these kids. They are learning so much about U. S. geography, and thrilled about connecting with other kids across the country. We will definitely continue this throughout the year! If you are looking to connect with us, our Twitter handle is @MehtasBESpandas.

Thanks for making it this far! Please let me know of any questions or suggestions in the comments section! :) Happy teaching, everyone!


ABOUT THE AUTHOR:
Megan Mehta is a Third Grade Teacher at Ballantyne Elementary. This is her 14th year as an educator and her 12th with CMS. She is grateful for the opportunity to work with so many wonderful students and colleagues every day! She would love to connect with you on Twitter at @megan_mehta and you can follow her class' adventures on Twitter too as @MehtasBESPandas.
3 Comments

Literacy Across Disciplines with Subtext

3/16/2014

0 Comments

 
by Margareta Tripsa, English as a Second Language Teacher at Smithfield Elementary
Picture
Success in our modern global society requires postsecondary learning and postsecondary learning requires students to display disciplinary literacy. Literacy, the ability to read, write, listen, speak, think critically and perform in different ways and for different purposes, begins to develop early and becomes increasingly important as students pursue specialized fields of study in high school and beyond.

The Common Core State Standards, which target college and career readiness, were built on four Key Considerations. According to the first consideration (a focus on results, rather than means), teachers are free to employ whatever approach and tools fit their teaching style and help their students meet all instructional standards. This gives schools a lot of flexibility, but at the same time their accountability increases. According to the second consideration (an integrated model of literacy) reading, writing, speaking, and listening must be integrated into each discipline across all grades so that all students gradually build knowledge and skills toward college and career readiness. A third consideration (research and media skills blended into the standards as a whole) talks about the need to embed technology throughout all standards as opposed to having separate standards for technology and media skills because of the nature of today’s society which is increasingly technological- truly an information age. The way we deliver instruction should reflect the reality of the society. Only by doing this, we ensure the fact that the new generation will be ready to succeed as future productive citizens who need to be active consumers and producers of content. This key consideration also points out the need for our students to be presented with both print and nonprint texts in old and new formats. The fourth consideration (shared responsibility for students’ literacy development) disseminates the fact that all teachers are language teachers. Literacy is a shared responsibility not only of the ELA teachers, but of all subject area teachers. The Common Core requires us to adopt an interdisciplinary approach.


These four considerations represent a good justification for the use of a tool like Subtext in the classroom. Subtext is a FREE collaborative reading app for the iPad. Subtext claims that it promotes and facilitates an elevated reading experience on tablets. It is a great tool to help students break down complex texts and it is perfectly suited for close reading. It allows groups to exchange ideas and interact within the pages of digital texts. Just think about the benefit of being able to leave notes or questions in the margins of a digital book and getting replies in real time from teachers and other peers as opposed to just you scribbling on a paper book, let alone the fact that you wouldn’t even be allowed to do this when using regular classroom textbooks or library books. Subtext provides many other tools to support reading. It can be used with 2nd grade through high school/college students. I have used it with 2nd grade, and my students have enjoyed it tremendously.

To begin, you can watch the following video about it:

Teachers Talk About Subtext from Subtext Video on Vimeo.

Picture
What does Subtext bring new to the table? Why would you use a collaborative reading app like Subtext as opposed to using paper books? I will start by asking you several questions:

-How many of your students would take the time to look up words in a dictionary, and how often would they do it? What would you say if you had the opportunity to have instant access to definition for all words in a text?

-How often would students be allowed to annotate the books they are reading and to highlight key information? And how easy would it be for you to check out everybody’s annotations and answer the questions they might have?

-How easy is it for students to both read at their own pace and have academic conversations about their reading while reading without interrupting their peers or the instruction?

-What would you say about the possibility to supplement students’ reading with multimedia resources embedded in their passage to build background, reinforce concepts, or address all learning styles all provided at the right time according to each student’s reading pace?

-What would you say about giving the students the opportunity to get feedback in real time from you and from their peers?

-What would you think about the possibility to quickly check for understanding through polls, true/false questions, or multiple choice questions right in the middle of their reading and again tailored to their reading pace?


By using Subtext, you can do all these and even more! There are three options available for adding digital documents to Subtext. First, you can use any free book you find online in the public domain, second, any Web article you find on the web can be automatically converted to an eBook while being uploaded to Subtext, or third, any PDF document. I found it very easy to email PDF documents to my inbox, and then open the document in Subtext, but I also tried the other options, too. So far, I have used only the free version, and have enjoyed a great variety of features. The paid version offers extra features such as the possibility to have the whole text read aloud to the students (text to speech), the possibility to give students assignments and to use Common Core aligned assignments designed and shared by other teachers, and also the possibility to track students’ progress. This last feature offers great insight into students use of Subtext features such as how many minutes they spend on a page, how many look ups they did, how many comments they typed in, how many annotations they made, etc. In addition, you can also see each student’s data compared to the group average. 

Today there is much talk about the impact of digital resources on learning and instruction. A good technology tool allows users to do much more than they would be able to do without it. Because of the versatility of the digital text and its various features, using Subtext is much more than just having a book on a tablet instead of on a paper book. Teachers are able to differentiate their instruction much easier and respond to each student’s needs with just the right tools helping them approach rigorous content and increasingly complex texts. Students are able to interact and collaborate in a dynamic learning environment.

You can see below what a page looks like after the students have interacted with each other, with the text, and with the teacher in Subtext. 
Picture
For step to step screenshot directions and to see what it looks like in practice, you can access my post about Subtext on my teacher blog, Techie Teachers’ Tricks. 
ABOUT THE AUTHOR:
Margareta Tripsa is a visiting international faculty teacher and has been teaching for 5 years in CMS (out of 13 years of teaching experience), currently she teaches ESL at Smithfield Elementary, CMS, NC. She earned her Master’s of Arts in Teaching English to Speakers of Other Languages. Ms. Tripsa was awarded the Global Educator Award 2013. She loves both engaging students with technology tools and helping teachers build technology fluency while working with ELLs.  She is passionate about the TPACK (Technological Pedagogical and Content Knowledge) framework and believes that effective technology integration involves skills and knowledge of technology, pedagogy, and content taken together, not in isolation. You can connect with her, visit, or follow her educational blog, Techie Teachers’ Tricks for more resources.

0 Comments

Death by PowerPoint, No Longer! Nearpod to the Rescue!

3/3/2014

2 Comments

 
by Gretchen Schultek, Third Grade Teacher at Berewick Elementary
Picture
During planning one day, my literacy coach proposed that my team engage students in a review of material in a manner similar to the game “Jeopardy.” However, why not have each student work on a device at their desk to answer instead of answering out loud as one large class? This was genius- why not?! The program she referenced was an app available on iPads called, “Nearpod.“

In order for students to all interpret the information and really think during class, they have to be held accountable in some way. Having students engage in a review where they each have to reply was ideal. (Besides on a test, when do we really have that happen?) Thus, my team checked out a cart of iPads (5 per class = 1 iPad per table group). I stood at the SmartBoard and manipulated the screen to showcase the questions, as students collaborated with one another and selected their answer on the iPod. The results graphed immediately in front of the class making it easy for me to see how we as a class were progressing towards mastery of the content. Students reinforced the knowledge by teaching each other through discussion of potential answers to numerous questions. “Oh, I get it!” or “You’re right, I forgot about that!’ was heard often. They enjoyed the instant gratification of seeing the correctness of their answer.


Below are some pictures of my students utilizing the Nearpod app on the iPad during our review game:

Picture
Check out my students collaborating during our review game.
Picture
Here is an example of the graph that shows how much we are “getting” it, which updates in real time (the reason for “no answer”).
Picture
Here is an example of the creative student group names and their score on question one.
Picture
We can increase rigor too! We asked an open-ended exit-ticket type question to end our review session. I can quickly see the responses and the students can learn from each others responses too; quite the Win-Win scenario.
As if you couldn’t tell already, I think this is so exciting! I absolutely LOVED interacting with technology, providing content in a new way to my students, requiring all students to demonstrate mastery of the content, and having fun! My students cannot wait to do this again with EVERYTHING (oh boy- this might not work out well for me! hehe).

It is really easy to do. Download the Nearpod app on your device and create an account. Then, get started!

Check out this video for additional information. Want to know what other teachers think about Nearpod? See it for yourself here.


ABOUT THE AUTHOR:
Gretchen Schultek is currently a Third Grade Teacher at Berewick Elementary School. During the past 8 years, she has taught second, third, and fifth grade in Charlotte Mecklenburg Schools. Blogging became a way for her to reflect on her classroom experiences and network with quality educators on the web whose experience could guide her development as an educator.  She looks forward to strengthening her teaching craft with quality educators who are creative, passionate, and open-minded right here in our own school district! 
2 Comments

iCan with iPads

1/27/2014

0 Comments

 
by Wendy McElhinny, Third Grade Literacy Teacher at Mountain Island Elementary
Picture
 Using technology in the classroom has been an educational best practice for years. Technology in the classroom has evolved from scissors to calculators to computers to interactive whiteboards to tablets. I enjoy learning about new technology and always try to be at the front of the pack when using technology in the classroom.


The purpose of this blog post is to show how I manage the use of iPads in the classroom.  I prefer iPads to other tablets when using them in the classroom for students to learn, create, and design, but some of the activities that I will refer to in this post can also be found in Google Play or on the internet. I have an iPad from CMS, my personal iPad, an iPad donated by a community member, and two iPad minis I received from Donors Choose. My school has a cart of 30 iPads that teachers can schedule for classroom use. We also encourage students to bring their own technology, but only about 30% of my students have their own devices.

 The management of iPads in the classroom is important in order for activities to run successfully. I have the iPad Learning Station where I post expectations, passcodes, student schedules, tips for connecting to the internet, and a list of apps explaining when they can be used during the day. Students have become independent when using the iPads because they do not have to ask for help--everything they need is on the display.
Picture
 When I have specific projects or activities that I want students to work on, I set the iPads up in stations. The organizer in the picture above is what I used the last time I had the iPad cart for the day. Students worked throughout the day with their table groups to complete five activities. I set the timer and at the end of time I rotated the color groups so students knew which activity they were responsible for completing at that moment.
Picture
THE STATIONS: 
  • Raz Kids- Students can listen to books, read books, take quizzes, and record themselves reading.  Raz Kids allows students to read books at their reading level. They can improve comprehension and fluency. This online program can be accessed through the internet, but if you are using iPads you must have the app downloaded because it will not run through Safari.

Picture
  • Word Wizard-Students can practice spelling words that are grade-level appropriate or related to specific topics. Students have their choices written inside their Words Their Way folders so that when they use the app they know which words lists they can choose based on their spelling proficiency. Students are currently doing research on animals, so the students below are practicing words from the animals list.

Picture
  • Coding-This basic introduction to computer programming helps develop critical thinking skills. Students can use the apps Kodable, Cargobot, or Hopscotch. They can also use the website www.tynker.com and click on Hour of Code. In addition to a learning station, I also use the coding activities with one of my students on a behavior contract. If he earns his points for the day, then he can spend 15 minutes coding.

Picture
  • Book Creator-Students have used this app to design, write, and illustrate their own books. Some students who have become more proficient have started using iMovie. Two of my students who have recently become good friends created what they called a Friendship Scrapbook.

Picture
·         Kid Rex-This is the search engine (www.kidrex.org) I prefer my students use when they are doing research. Right now they are researching an animal of their choice to use for an informational writing assignment with their partners. Students can watch videos of the animals in natural habitats and listen to interviews with zoologists.


     My students enjoy catching up on the daily world news through the app News-o-matic. They read National Geographic for Kids in the iPad Newstand. They play a game called Baloney which allows them to answer true and false questions from across third grade curricular areas.  I have found it helpful to connect my CMS iPad to the Smart Board and students will come up and participate in an activity that way. I know that it can be difficult to utilize technology in a classroom when you do not have devices, but I encourage you to expose your students to as much technology as you can.
ABOUT THE AUTHOR:
 Wendy McElhinny is a third grade Balanced Literacy Teacher at Mountain Island Elementary School. She has been a teacher in CMS for 17 years. She holds her Masters Degree in Elementary Education and is twice National Board Certified. She is the author of the educational blog, McElhinny’s Center Stage. You can follow her on Twitter @McElhinnyMIE.

0 Comments

Instructional Uses For QR Codes And Creating them Using GAFE

11/13/2013

2 Comments

 
by Jill Thompson, Instructional Technology Specialist
“Traditional thinking is all about 'what is'. Future thinking will also need to be about what 'can be'"by Edward de Bono

Quick Response codes also known as QR codes are similar to barcodes. When you scan QR codes using apps such as i-nigma or scan with your smartphone, iPad and computer (if you have a web camera) it links information to you. The information can be text, videos or websites etc. I see QR codes becoming more popular in the classroom because they can be read on many devices and it is a real world application. Here are some ways you can use QR codes in the classroom.
1. Put QR codes on classroom library books using labels/stickers so it stays nicely on the book. You can start by you creating some of the QR codes for books and then eventually letting the students make their own telling about why other students should read this book. You can also have students create ‘book trailers’ and turn them into QR codes using iMovie! You can also place QR codes inside books where you want the student to stop and do a comprehension check or a reading response without sending home a worksheet.

2. You can create scavenger hunts and/or webquests for your students that get them moving around the room. Scanning a QR code makes is easier for the younger students so they don’t have to type the long urls. You can also place QR codes around the school informing parents and/or students about different places around the school.

3. Add QR codes to homework sheets that are helpful hints. For example, if the student forgets how to solve a math problem or gets stuck, they can scan the QR code for help. You can put them at the bottom of the page or right next to the problem. The QR codes can be linked to a ‘how to video’ such as a Khan Academy  video or a ShowMe video you created yourself. You could also link the code to text such as the math notes that were given that day.


4. You can have the students become self-directed learners by creating QR stations. The students scan the QR code to reveal the task and the students must work together to get the task complete. This builds on the 21st century skills of communication, collaboration and critical thinking. In a science classroom, the QR stations could have codes stating how to do an experiment or it could explain a task that the students had to complete. For example, using the materials in front of you, you must design an experiment in thirty minutes that demonstrates all three of Newton’s Laws and must use at least one simple machine. QR stations can work in Physical Activity (GYM), Art, Music or any classroom!

5. A fellow teacher and virtual friend, @MrLemere, had his kids use QR codes to create work-cited pages for their research. What a great idea! He was able to check for copyright/paraphrasing issues on the spot and show the kids who copied word for word, and why it was wrong!

6. QR Voice Reader allows students to record themselves and turn the audio into a synthesized voice. This is a great way to have students practice oral reading or read their poems.

7. Make QR codes games. My students hated doing word problems so I made a QR circuit with word problems. The students were moving around the room, using their devices and practicing solving word problems. How I did it was by creating several word problems using QR codes and put the answers around the room. Once they solved the word problem, the answer directed them to the next word problem, creating a fun circuit.

8. Print your QR codes in color or do it the cheap way and print the QR codes on colored paper. Why color? This is a great way to differentiate instruction or use for jigsaw activities. You can have the low students scan the red codes, the middle can be blue and high can be purple; this way the students are all doing the same activity, but reading on their level.

To start putting some of these great ideas into practice in your classroom, you can use QR creators such as Kaywa, QRStuff if you just want to create one QR code but I like using Google docs when creating multiple QR codes quickly. I adapted the below directions from Tammy Worcester’s tech tip.

1. Log into Google and go to Google Drive.

2. Click on the create button to the left hand side and click on spreadsheet.

3. Label column ‘A’ Information. This is where you will put the information you want the QR code to have, for example your text, video, url etc.

4. Label column ‘B’ QR Code. (Eventually your QR code will appear here)

5. Resize the columns and rows so they are approximately 2 inches by 2 inches. You want them big enough to be able to scan easily.

6. Copy and paste this formula in cell B2, then click enter. (If it doesn’t work the first time, sometimes you need to manually type it in)

=image(ʺhttps://chart.googleapis.com/chart?chs=150x150&cht=qr&chl=ʺ &A2)

7. A QR code will appear!
*If doesn’t work on the first try, it could be because you had a space after the A2) so delete the space and try again. The row will change to green and that is how you know it will work. Ex. A2.

8. Click the tiny blue square in the bottom-right corner of the cell and drag down to fill the formula in that column. QR codes should appear for all the information you filled in each row. If you didn’t fill in each row and you see QR codes then you can go back and put in information and those QR codes will change to add the new information.

9. Print them out, cut them up and place where you want them in your classroom.

ABOUT THE AUTHOR:
Jill Thompson is an Instructional Technology Specialist in the district. She was previously a Math and Science facilitator for a year and taught in the classroom for 8 years prior to that. A graduate of Salem State College in Salem, Massachusetts, she has obtained a Bachelor of Science in Elementary Education and Bachelor of Arts in English. She has also obtained her AIG (Academically or Intellectually Gifted) licensure at UNCC and earned her Masters degree in Curriculum and Instruction at Winthrop University! Additionally, she is an adjunct professor at UNCC and teaches Instructional Design and the Use of Technology with Elementary School Learners. 
2 Comments

Technology Program at Morehead Stem Academy

10/25/2013

0 Comments

 
by Stacey Self, Technology Facilitator at Morehead STEM Academy
ABOUT MOREHEAD STEM ACADEMY
Morehead STEM Academy is a K-8 magnet school in Charlotte. As a STEM school, we focus on Science, Technology, Engineering, and Mathematics. Teachers at Morehead try their best to provide high level activities that integrate these topics. In elementary school, grades K-3 have a “STEM” block once a week, and each quarter we change which part of STEM is focused on. Next quarter is technology, where students will learn how to use iPads and complete high level projects with these devices. We also have a Project Lead the Way Pilot for Elementary School where students research careers they are interested in. 

In Middle School, we have teachers that teach Science, Engineering, Math, and even business/career classes. Since technology can be included in all of STEM subjects, teachers need all the support they can get for technology.
CHECKOUT PROCEDURES
At Morehead STEM Academy, we do not have a 1:1 device program. As a part of our BYOT program, students are encouraged to bring their own devices to engage in research, note taking, and collaboration. Since we do not have a 1:1 program, we must ensure that the technology we do have is used to promote higher level thinking skills, and 21st century skills such as communication, critical thinking, collaboration, and creativity. To do this, we have a checkout procedure in which the teachers fill out a very simple form. Teachers request the technology (iPads, Chromebooks) and explain what they will be using it for. Then, the technology facilitator (I) or the PD Facilitator (Jill Smith) approve or disapprove the request. From there, we send a Google Calendar invite to notify the teacher of approval, and one of us will sign them up for checkout.
PROFESSIONAL DEVELOPMENT
Since technology can be seamlessly integrated into all STEM subjects, teachers need plenty of support. Twice a month, professional development is offers for the teachers. One of the options is Technology. In this Technology PD, the teachers are learning how to integrate Project Based Learning with technology organized in an iTunes U course. Another option for Technology PD is every other Monday during the entire day; teachers can come learn about a technology topic during their planning time. These topics include, but are not limited to: 
  •  Creative Commons (understanding copyright issues)
  •  Website Design with Weebly, Wordpress, Google Sites & Wiki Spaces
  • iPads & Accessibility 
  • Google Drive & Gaggle with Students
  •  Content Creation on the iPads
  • Discovery Education
  • Web 2.0 tools for 21st Century Skills
  • iBooks
OUR GOAL
Mr. John Floyd, our principal,  has a vision for each student to have access to a device (see video above). As you can see, our school is ready to move to a 1:1 device environment. The support is here, for technology, as well as the rest of STEM. We have 3 Academic Facilitators, a Science Facilitator, a PD facilitator, two Assistant principals, and a technology facilitator. We are working hard applying for grants to make this dream happen. We believe that if every student had access to a device, students could take paperless assessments with instant feedback, take control of their own learning, research and create!
ABOUT THE AUTHOR:
My personal belief is not just giving teachers a bunch of tools to use, but how the tools connect to their content areas, and how technology can support student learning AND engagement. Technology is not meant to be a ‘babysitter’ which I see it being used for regularly (not at Morehead, of course!). Students love to create and collaborate!! I am a huge advocate for Project Based Learning where students take learning into their own hands and complete tasks that will help them be successful citizens one day.

Although young and less experienced than others, I believe with my whole heart that all students can learn, and technology serves a HUGE role in that. This is only my 4th year in education, and my 2nd year in the technology field. Prior to my technology focus, I taught in Korea for one year. Prior to that, I taught 2nd and 3rd grade for CMS. Currently, I am finishing up my graduate degree at UNC Charlotte in Instructional Systems Technology & Leadership. At home, my husband and I have four international students’ grades 8-11, and a baby on the way!

I also work for CMS as a Professional Development Master Teacher (PDMT), so you may see me in other areas of the district as well. Please follow me on Twitter @techystacey, and be part of my PLN where I post articles connected to technology, education, and motivation. I also attend the monthly Technology Facilitators meetings where I would love to meet other technology facilitators to collaborate on what they are doing at their schools and share ideas.
0 Comments

Formative Assessment Made Easy: The Power of Socrative in a Blended Learning Environment

10/9/2013

5 Comments

 
by Romain Bertrand, Math Multi-Classroom Leader at Ranson IB Middle School
What if I told you that there was a FREE resource out there that allows you to know instantly which students got it today and which students did not? It even does this without  you having to grade a single paper! All you need is a computer or a tablet (like the HP revolve) and x number of devices for the students. These can be your brand new Chromebooks but also traditional desktops, laptops, tablets or smartphones (thinking of you, BYOT schools). All you will need to do is sign up at a free website, write your virtual room number on your board and figure out all the many new and creative ways you and your students will be able to communicate from now on.  This resource exists and it is called Socrative!

My name is Romain Bertrand and I am the Multi Classroom Leader for Ranson IB 6th and 7th grade Math Blended Learning programs. In a few words, at Ranson IB, our 6th and 7th graders receive math instruction both in class and online. They constantly rotate between small group classroom work with their teachers, online instruction (with tools such as Compass Learning, Show Me, Socrative, etc..) under the guidance of two learning coaches and flex teaching time with me focusing on the areas in which the data shows they need the most help. 

One of our constant goals is to increase our ability to collect learning data quickly and efficiently. This way we can make prompt decisions to improve the learning of our students: Which group should they go to, what concept do they need the most help with, and what do they already know? A few weeks ago, as I was researching free tools that can be used with our Chromebooks, I came across Socrative, a free website that “sells” itself as being able to make formative assessment absolutely stress- and paper free. I decided to give it a run and to help our 7th grade math PLC get familiar with the resource and use it daily in class in less than two weeks. After reading this post, my hope is that you will have a good sense of the potential and limitations of the tool but also concrete ways to use it in your schools.

TWO CONFLICTING IDEAS AROUND FORMATIVE ASSESSMENTS:

Pardon my math lingo here but we should start by establishing the two following axioms, or principles:

1. We would love to know at all times if the students are truly "getting" what we are teaching: We want to know this during the class, so we can adjust our lesson on the spot,  but also right after it is over, as we are getting ready for the next day. This allows us to make critical decisions that improve the quality and the level of differentiation of our next lesson.

2. Knowing if the students “are getting it” is extremely difficult and can discourage teachers to do it as often and as effectively as they should. During the class, despite our efforts to be better questioners, we can often walk out thinking we have heard from everyone when we have only heard from a few. At the end of a class, we know we should give exit tickets/formative assessments every day but we can quickly get overwhelmed with the amount of grading involved. Therefore, we often end up looking at the data too late to let it truly drive our instruction.

HOW SOCRATIVE CAN MAKE FORMATIVE ASSESSMENT EASY
First, there are two versions of Socrative-- one for the teacher and one for the students.

Socrative Teacher requires you to create a free account at www.socrative.com. This can be done in less than 3 minutes and there is no need to create or import any classes. Once you have created your account, you will be taken to a fairly simple dashboard from which you can launch any Socrative activities. You will also receive a virtual room number that you can post in your room for the rest of the year; it does not change and it is the only thing students will ever need to join your virtual room. 

Socrative Student does not require the creation of any account. Students simply go to www.socrative.com from any web browser or from the IOS/Android app and click on Student Login. It will take them to a simple screen prompting them to join your virtual room. They will type in the room number you have on your board and that is it! They will be ready to interact with you by answering questions and giving you "on the spot" feedback. All of which you keep track of on your “Socrative Teacher” dashboard.

Check out this short tutorial video from Socrative:
WHAT WE HAVE BEEN ABLE TO DO WITH SOCRATIVE IN LESS THAN TWO WEEKS
Now that your students are in your virtual room, it is important to understand that there are two types of activities you can launch from Socrative:

1.  On the spot data and feedback collection: With this feature, imagine you just taught a mini lesson and you would like to get a sense of whom will need the most help during the independent practice time. You launch a multiple choice, true/false, or short answer question from your Socrative. The question does not have to be entered into Socrative. The website will prompt students to answer the question you give them on the board. This way, you can even improvise the question on the spot based on what you observe from the students. As soon as you launch the question, students can start entering their responses and you see them live on your computer or tablet. At the end, you will have a graph and a spreadsheet with all of this data already organized!

In the following video, our 7th grade math blended learning teacher, Ms. Whelan, and I, are turning the Warm Up of the Day into a Socrative multiple choice question. It allows us to really see what students are struggling with. It also helps them speak about these mistakes as they see so many classmates making them. It truly turns mistakes into learning opportunities.
2. Formative assessments with reports emailed to you as the students walk out!!! Imagine if you had the power to give an exit ticket or a quiz during a class and to magically have all of the answers, recorded, graded and organized in a spreadsheet for you. Socrative can literally do this and after two weeks using this feature, I can already tell you that I could not live without it moving forward. Now you must be wondering how this is possible if you do not import classes to the system. Well, Socrative will simply prompt your students to type in their names before they take the assessment. Here are a number of ways we use the exit ticket and quiz features:

As a PLC, we wanted our scholars to analyze their data from our first common assessment on Discovery Education. What were their strengths and areas of growth? What could they do better in class and at home? What did they need us to do better in class and online? We created a Socrative quiz with all these questions and we asked our scholars to take this online questionnaire at the beginning of a class. By the end of each block, teachers had a complete spreadsheet with student responses to each question.

In this video, you will see our 7th grade honors math teacher, Ms. Virella, launching the activity with her scholars and using this time to start conferring with them. You will also see both 6th and 7th grade math PLCs engaging in their data conversations after this reflection activity.


Picture
I also want to share an awesome idea that I saw our PLC lead, Ms. Robinson, implement on the spot to improve the efficacy of her students as they took the survey. She took the iPad and started looking at the progress of each student live on her dashboard. She then started narrating where each scholar was in the process. We saw an immediate positive impact on the way scholars were taking the quiz! With new technology tools come new ways to communicate with our students!

 We assign daily exit tickets via Socrative for students who are working online. This way, we can get instant data on how they worked, their responses, and specific skills they need for additional support. Students join the virtual room at the end of the class and input their answers. We receive detailed spreadsheets that look like this one (with the name of the students, of course):

Note that if you do not have enough devices for each of your students, it is very easy to let two students (one at a time) take an exit ticket using just one device. We have also experimented with the idea of exit ticket stations that students rotate through toward the end of the class to leave valuable feedback and data. This ensures that all students participate even if we have less devices than we have students. For example, in my flexible teaching groups, I pull 6-7 scholars from our learning labs every 25 minutes for a targeted intervention. When they go back to the lab, there is an exit ticket station set up for them to take a short formative assessment on what we just worked on. This way, I can monitor the progress of my scholars. I can also make decisions during the day as I can look at the report in between classes and see what parts of my lesson plan needs to be modified. It is that quick and that easy!

As you can see, this FREE resource has huge potential!  Socrative 2.0 is being launched this week and promises to make our teaching and learning experiences even better!

I hope this in-depth look at Socrative and how it is changing the way we formally assess at Ranson IB will help you maximize the brand new Chromebooks you just received or the devices your own students bring to school every day. What a great time to be a teacher, and yes, I know it is October!

ABOUT THE AUTHOR:
Romain Bertrand is the Multi Classroom Leader for 6th and 7th grade Math Blended Learning Programs at Ranson IB Middle School. A native of France, he has a passion for teaching and instructional coaching as well as integrating technology to help teachers and students grow. He would love to be added to your PLN and learn more about all the great things you are trailblazing at your school. You can connect with him on Twitter @htdcompletely
5 Comments

We Only Get Stronger When It Is Difficult

10/4/2013

2 Comments

 
by Joshua Lemere, Fifth Grade Teacher at Barringer Academic Center
Picture
The mantra of Common Core has required each and every one of us to redesign and upgrade our incredible craft of teaching.  One huge aspect of this has been to heighten our expectations of what students should be able to do.  No longer are students required to simply memorize mathematical algorithms or piecemeal reading strategies in the hopes that they “pick the right bubble” on the EOG.

The Common Core and Next Generation Assessments are requiring us to truly evaluate student learning and to take our expectations of them to great levels.  To sum it up, rigor has become a central theme to the way we instruct students.  This has been a huge focus in my classroom this year as we decided our class motto would be, “We Only Get Stronger When It Is Difficult.”

I focus on making my lessons “difficult” using one key concept – higher level questioning.  Many of us are familiar with the traditional “Bloom’s Taxonomy” where you move up the multi-colored triangle.  However, within the past ten years, this taxonomy has been revised, placing more of an emphasis on evaluating (providing valid reasoning for the way a thing is) and creating (using the design process to create, reflect, and refine your work).

While the lower levels are needed to ensure a basic understanding of topics, the higher levels are crucial to ensure that students have a sound and thorough understanding of the concepts you are teaching.  For example, in my fifth grade class, we just finished reading a World War II historical fictional novel entitled Torn Thread by Anne Isaacs.  In this story, two young Jewish girls live in a concentration camp near Poland and walk about 6 miles every day to a factory to produce clothing for the German soldiers.  Life was grim and brutal.  However, the prisoners in the camp made the best of life.  One of the skills I wanted to teach was to consider multiple perspectives of characters in a novel to better understand how characters can have multifaceted character traits.  With this understanding of the “hows” and “whys” of a character, they are more able to make deeper inferences as well as improving analytical skills as to the thoughts and actions of all the characters within a novel.


Picture
A specific activity that they worked on was to create an “underground” newspaper, where the various Jewish prisoners would tell of the latest gossip and various rumblings of life in the concentration camp.  This activity required the students to look at camp life with a “positive” spin, rather than a “negative” spin, allowing them to explore ways in which characters can make the most out of an incredibly terrible and unfortunate situation.

We utilized our “BYOT” capabilities to research various work camps in Nazi Germany (in addition to the real one in our novel) to have a deeper understanding of what day-to-day living would be like.  Students then took pieces of what they knew from the text, their additional research, and are currently in the process of creating of their underground newspaper.  They are also adding creative touches such as making the paper look rough-edged, worn, and slipshod as the Jewish prisoners had very little materials to produce underground newspapers.

I’m excited to see the end products and see how the students synthesized their understanding of the characters in the novel into having a different perspective about life in the camp.  The thinking required is deep, complex and matches my class motto of “difficult.”  In the end, they are better off for having a more complete and well-rounded understanding of the characters rather than just a one-dimensional view.  I also look forward to seeing the finalized creative touches they utilize to make it look like a genuine and authentic underground newspaper.


ABOUT THE AUTHOR: 
Joshua Lemere is a 5th grade Talent Development Teacher at Barringer Academic Center, a partial magnet school for gifted students.  He has a passion for teaching, learning, and technology. He would love to be added to your PLN and learn more about what you are doing in your school.  You can connect with him on Twitter @mrlemere.  
2 Comments

    Authors

    Our blog is comprised of guest blog posts  written and shared by  K-12 educators in Charlotte-Mecklenburg Schools. 

    Archives

    December 2014
    October 2014
    September 2014
    June 2014
    May 2014
    April 2014
    March 2014
    February 2014
    January 2014
    December 2013
    November 2013
    October 2013
    September 2013

    Categories

    All
    Assessment
    Blog
    Byot
    Coding
    Collaboration
    Common Core
    Communication
    Differentiation
    Edcamp
    Language Arts
    Math
    Motivation
    Nature
    Nbct
    PBL
    PLN
    Reading
    Rigor
    Speaking & Listening
    Stem
    Technology
    Twitter

    RSS Feed


Powered by Create your own unique website with customizable templates.